Tesla Paint Shop PNG Requirements: Size, Format & File Checks
Check Tesla wrap PNG dimensions, the 1 MB file limit, filenames and model compatibility. Learn which image to download and how to prepare your export.
Tesla Paint Shop needs the actual wrap PNG, made for your vehicle’s template—not a picture of the finished car. Tesla lists a resolution range of 512 × 512 to 1024 × 1024 pixels, a maximum file size of 1 MB, and a filename limit of 30 characters. Use the dimensions of the matching official template rather than forcing every vehicle into the same square.
This guide is a file preparation checklist for digital wraps on the vehicle visualization. It is not a specification for printing or installing physical vinyl. If you already have a file that meets the checks but cannot find it in the car, continue with the Paint Shop troubleshooting guide.
The image that looks like a car is usually the wrong download
A gallery can show a beautiful three-quarter view of a wrapped vehicle. That image helps you choose a design, but it already contains a camera angle, lighting and a background. Paint Shop needs the separate flat artwork that the model can read as a texture.
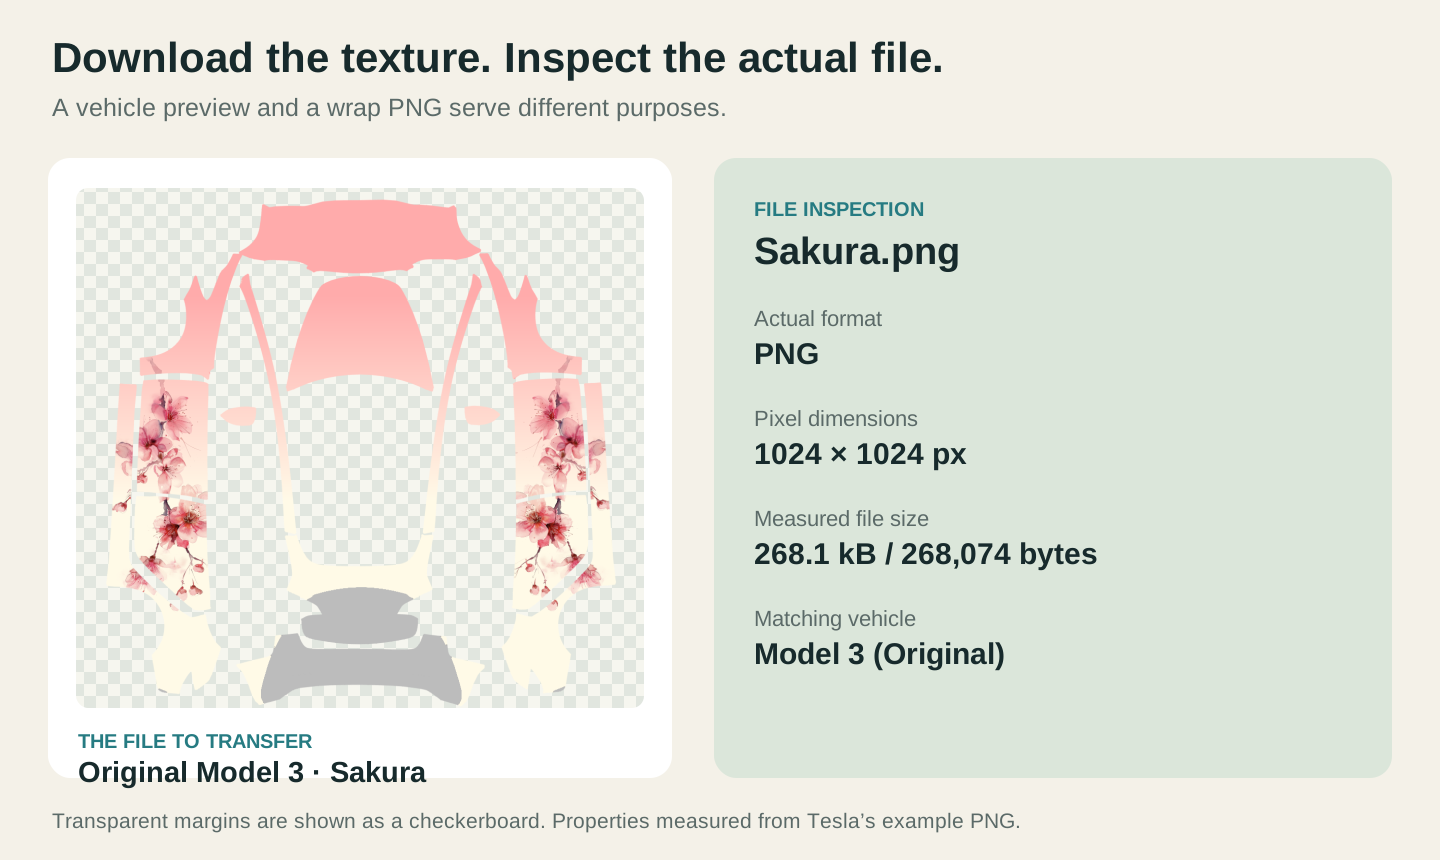
In the Tesla wrap gallery, open a design, inspect UV image, then use Preview in 3D to judge placement. Choose Download PNG for the transferable image. Saving the card thumbnail or taking a screenshot of the 3D preview does not produce the same file.
Want a known starting point? Open the official Sakura example for the original Model 3. That example is tied to the original Model 3 layout; use the Model 3 gallery or Model Y gallery for other versions. Downloads require sign-in. Official examples are free; premium gallery designs cost 2 credits, with weekly free picks marked separately.
Check five properties before transferring anything
The first four file rules below come from Tesla’s official custom-wrap instructions. The fifth check, matching the template, determines whether accepted artwork lands on the right body panels.
| Check | What to verify | Common mistake |
|---|---|---|
| Format | Export a real PNG image. | Renaming a JPG or WebP to .png. |
| Resolution | Follow Tesla’s stated range; retain the chosen template’s size and aspect ratio. | Exporting a 4K poster or stretching a rectangular layout. |
| File size | No more than 1 MB; leave some headroom. | Assuming a 1024-pixel image is automatically small enough. |
| Filename | Keep it short, using letters, numbers, spaces, underscores or dashes. | A long title with emoji, brackets or punctuation. |
| Template | Match model, generation and the listed trim. | Using a Model Y image on a Model 3 because both files are square. |
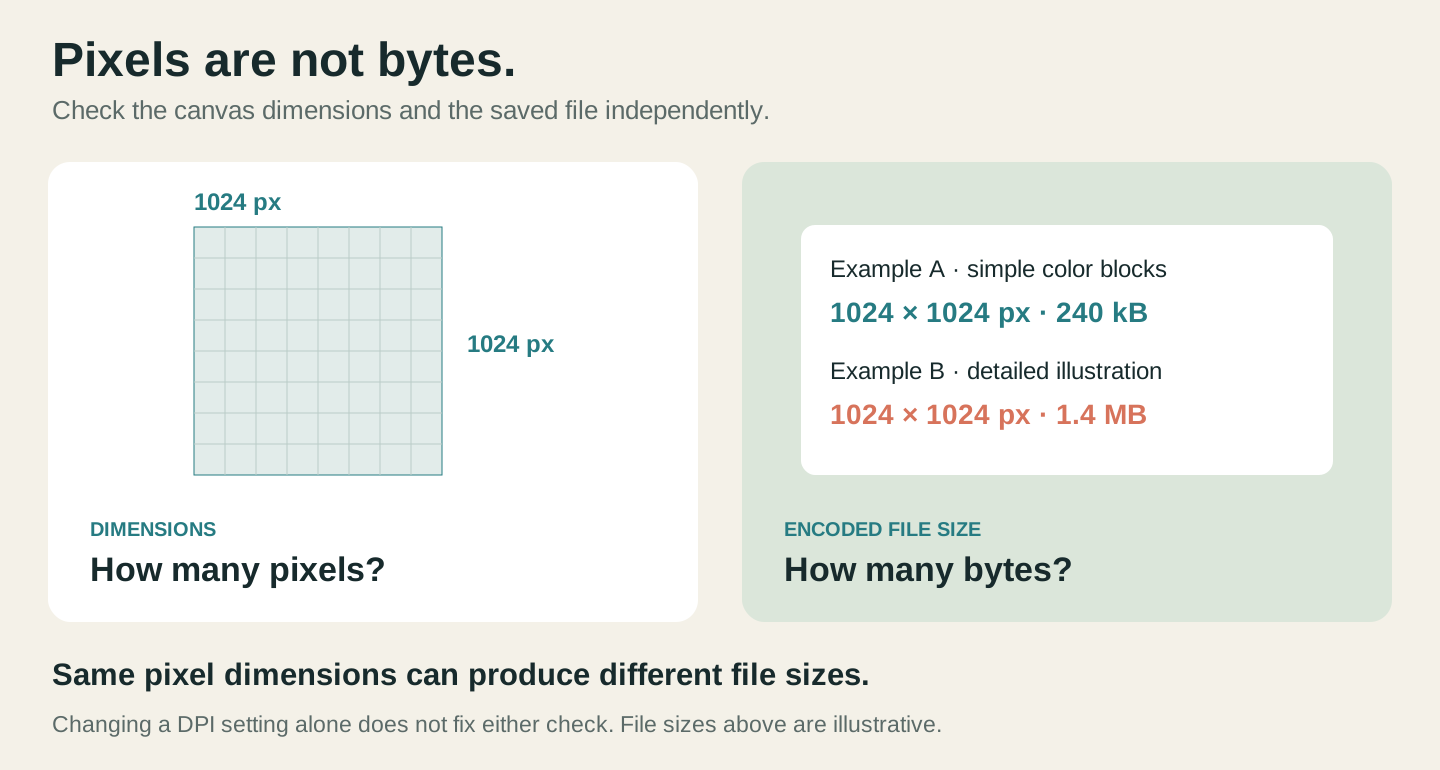
Open the file’s properties or your image editor’s image-size dialog. Check pixel dimensions and file size separately. A print-resolution setting such as 300 DPI does not establish either of those properties. Changing that number alone will not move artwork to different panels or make a large export smaller.
1024 pixels and 1 MB measure different things
Pixels describe the image grid. Bytes describe how much storage the encoded file takes. A simple two-color pattern and a detailed, noisy illustration can have identical dimensions but different PNG file sizes.
If the PNG is too large, keep an untouched copy and try these changes in order:
- Remove unnecessary content. Export the wrap itself, without interface chrome, teaching labels or a flattened screenshot background.
- Use a lossless PNG optimizer. This can reduce encoding overhead without intentionally changing image pixels. Check the resulting file size; a saving is not guaranteed.
- Simplify fine noise or reduce the palette if needed. This changes the artwork. Inspect gradients, skin tones and transparent edges for visible degradation.
- Consider a lower resolution only within the permitted range and the same aspect ratio. Resize the whole texture, never individual islands. Review faces and lettering again afterward.
Do not convert a wrap to JPEG just to make it smaller. If you use another editor to optimize the export, reopen that result in the same vehicle preview before transferring it. Preserve the original project so a smaller file does not become your only editable copy.
A valid file can still use the wrong model layout
A PNG can pass all four technical checks and still put a door graphic across a fender. Image dimensions do not establish vehicle compatibility. The layout supplies the coordinates; a different generation or trim can move those coordinates.
For example, the Model 3 Highland Standard & Premium template and Highland Performance template are separate selections. Model Y Juniper Standard, Premium and Performance also have separate choices. Our Model 3 and Model Y template guide links to each matching editor and gallery filter.
The UV layout visual guide explains why those disconnected pieces matter. To correct a mismatch, place the source artwork on the right template. Renaming the file or compressing it does not repair placement.
Keep the filename boring and the design interesting
Use a short name such as MYJuniper01.png. Avoid emoji and descriptive sentences in filenames, and leave ample room under the stated limit. The filename is an identifier, not the place to store your full design brief.
Some systems hide file extensions. A file displayed as MYJuniper01.png may actually be MYJuniper01.png.jpg; check its type in file properties. Conversely, typing .png onto a WebP filename does not convert the underlying image. Use an image editor’s export command when conversion is needed.
The last review is visual
Before leaving the editor, inspect the hood from above, both sides and the rear. Make sure a face stays complete, words read correctly, and temporary guides have been removed. A checkerboard used to show transparency should not have become part of the artwork. Keep the margins and panel boundaries from your chosen template instead of inventing new ones.
Then download one test PNG. Follow the phone and USB upload guide for the supported transfer route. A browser preview is useful, but the final check is the design shown by your own supported vehicle and software.
Is 1024 × 1024 always the correct export?
No. Use the matching official template as your reference, including its aspect ratio. Tesla’s repository includes different vehicle layouts; “make it square” is not a universal repair instruction.
Why does a PNG under 1 MB still look wrong?
File size says nothing about subject placement, orientation or template compatibility. If the image loads but its graphics are misplaced, inspect the UV layout rather than repeatedly compressing it.
Where can I get a matching file without designing from scratch?
Browse Model Y PNGs or Model 3 PNGs, select the exact vehicle version, and inspect a design’s UV image before downloading. For a custom result, open the matching editor from the version-selection guide.
File rules checked against Tesla’s official custom-wrap repository on October 30, 2026. Example properties were measured from the original Model 3 Sakura PNG. Illustrations explain file preparation; they do not claim an in-car import test.